HPC Software Carpentry - Lesson 3 - Transferring files
Learning Objectives
In this lesson you will learn:
- How to transfer files with FileZilla (Mac) and WinSCP (Windows)
- How to setup an ssh key
- How to transfer files with
scp
FileZilla and WinSCP
FileZilla (Mac) and WinSCP (Windows) are two software that provide a Graphical User Interface (GUI) to transfer files using a File Transfer Protocol (FTP). The first step will be to download them and install them. You can download the FileZilla client here and the WinSCP client here. [NOTE: these links might stop working in the future. If that’s the case simply search for FileZilla or WinSCP official website and there will be a link for download]. Once you have downloaded your respective FTP client it is time to create a connection with the HPC (below).
FileZilla
After downloading FileZilla, you will need to create a new ‘site’ within FileZilla. I am not sure why it is called a site but what it achieves is that is sets up the host (JCU HPC) and guest (you) details for you to connect to the HPC with FileZilla. Nigel and Wayne have provided a guide on how to achieve this as part of the HPC documentation, which can be found here. I stole their figures to replicate their guide, but for the most up to date guide in the future the official JCU Confluence website will be your go to place as things might change.
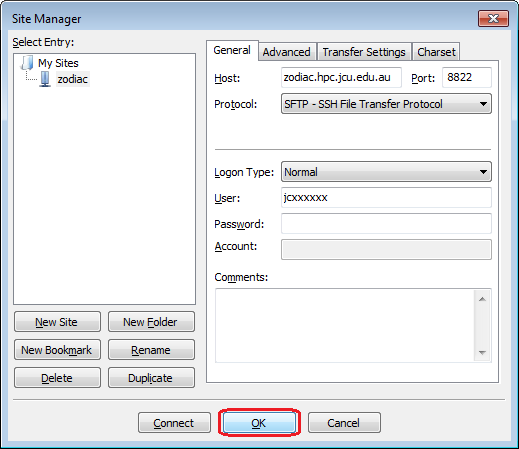
Set up site for use with SSH keys
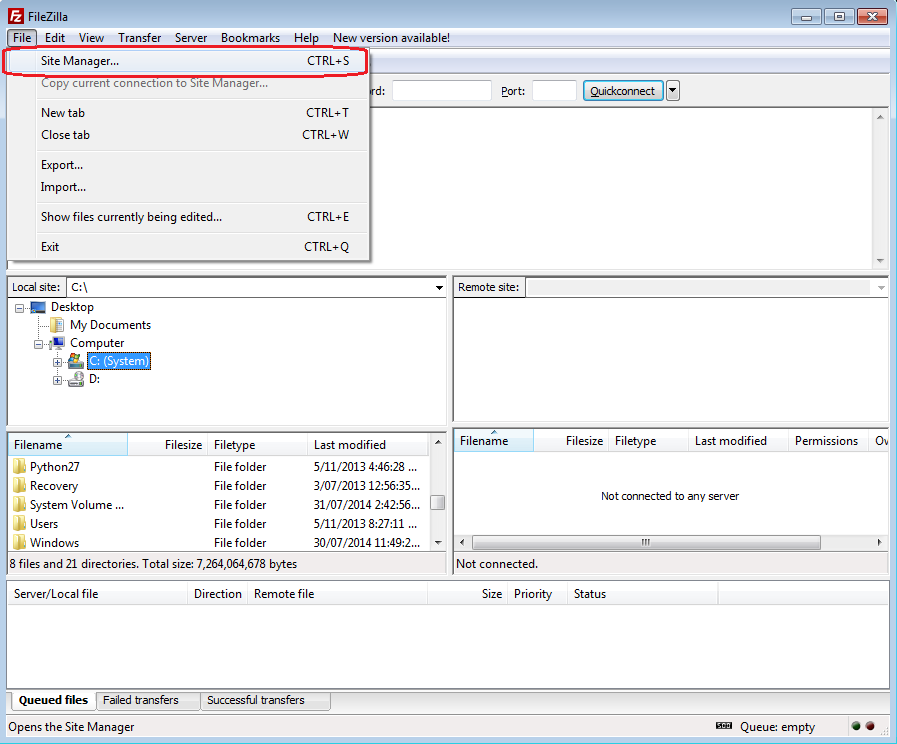
Start FileZilla and Select the File -> Site Manager menu item.
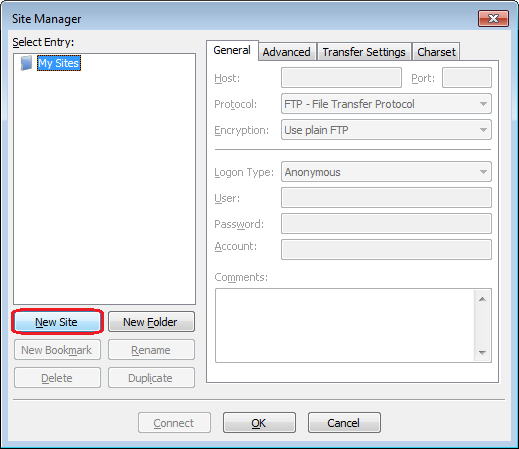
Press the New Site button.
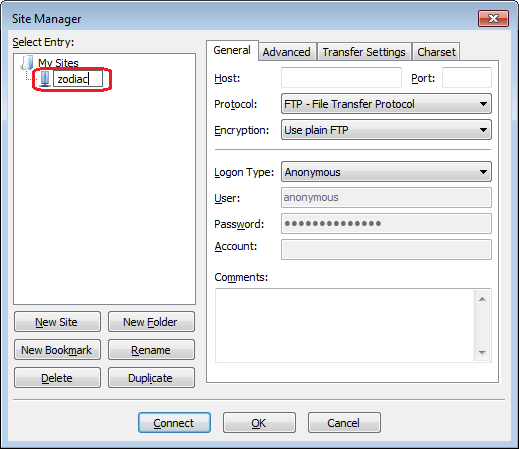
Give your new site the name zodiac
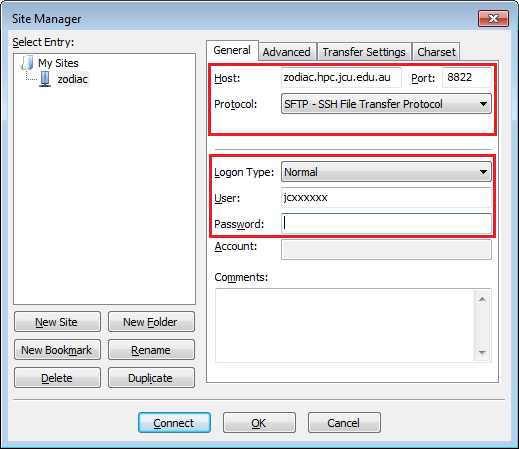
Set the following host settings:
- Host: zodiac.hpc.jcu.edu.au
- Port: 8822
- Protocol: SFTP - SSF File Transfer Protocol
And the following account settings:
- Logon type: Normal
- User:
- Password:
Press the OK button.
Connect to site
From the site drop down menu on the top left select zodiac and press Connect
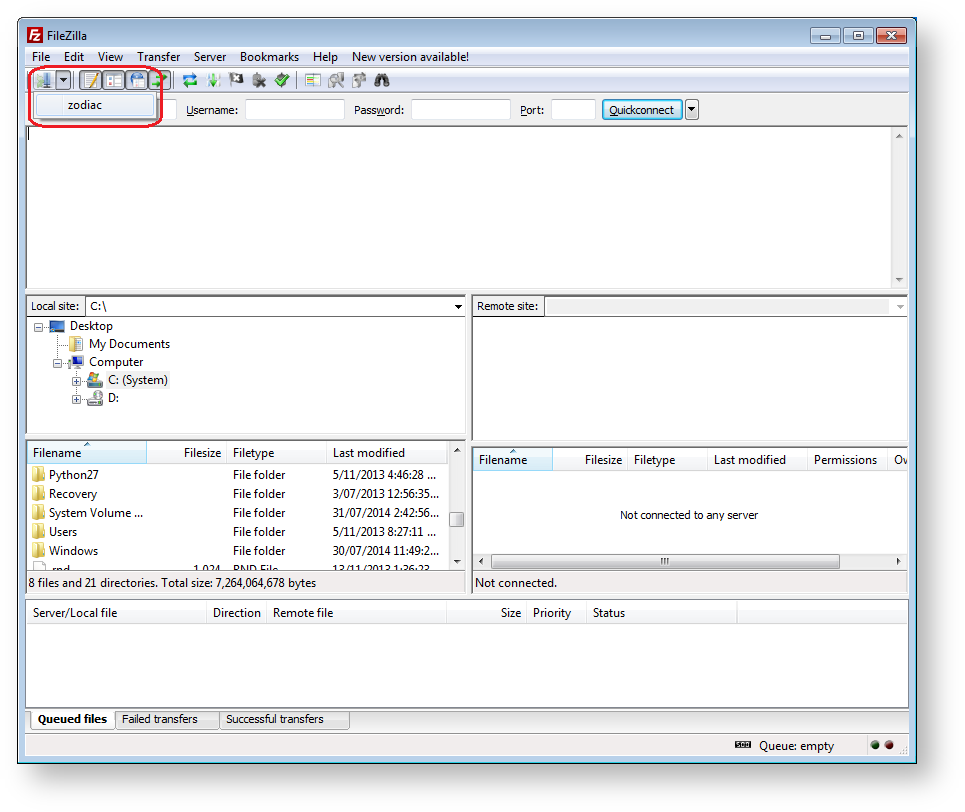
If you successfully connected you will now see your local site (e.g., your laptop) on the left, and the remote site (i.e., the HPC) on the right. Your home folder on the HPC will have the name jc000000.
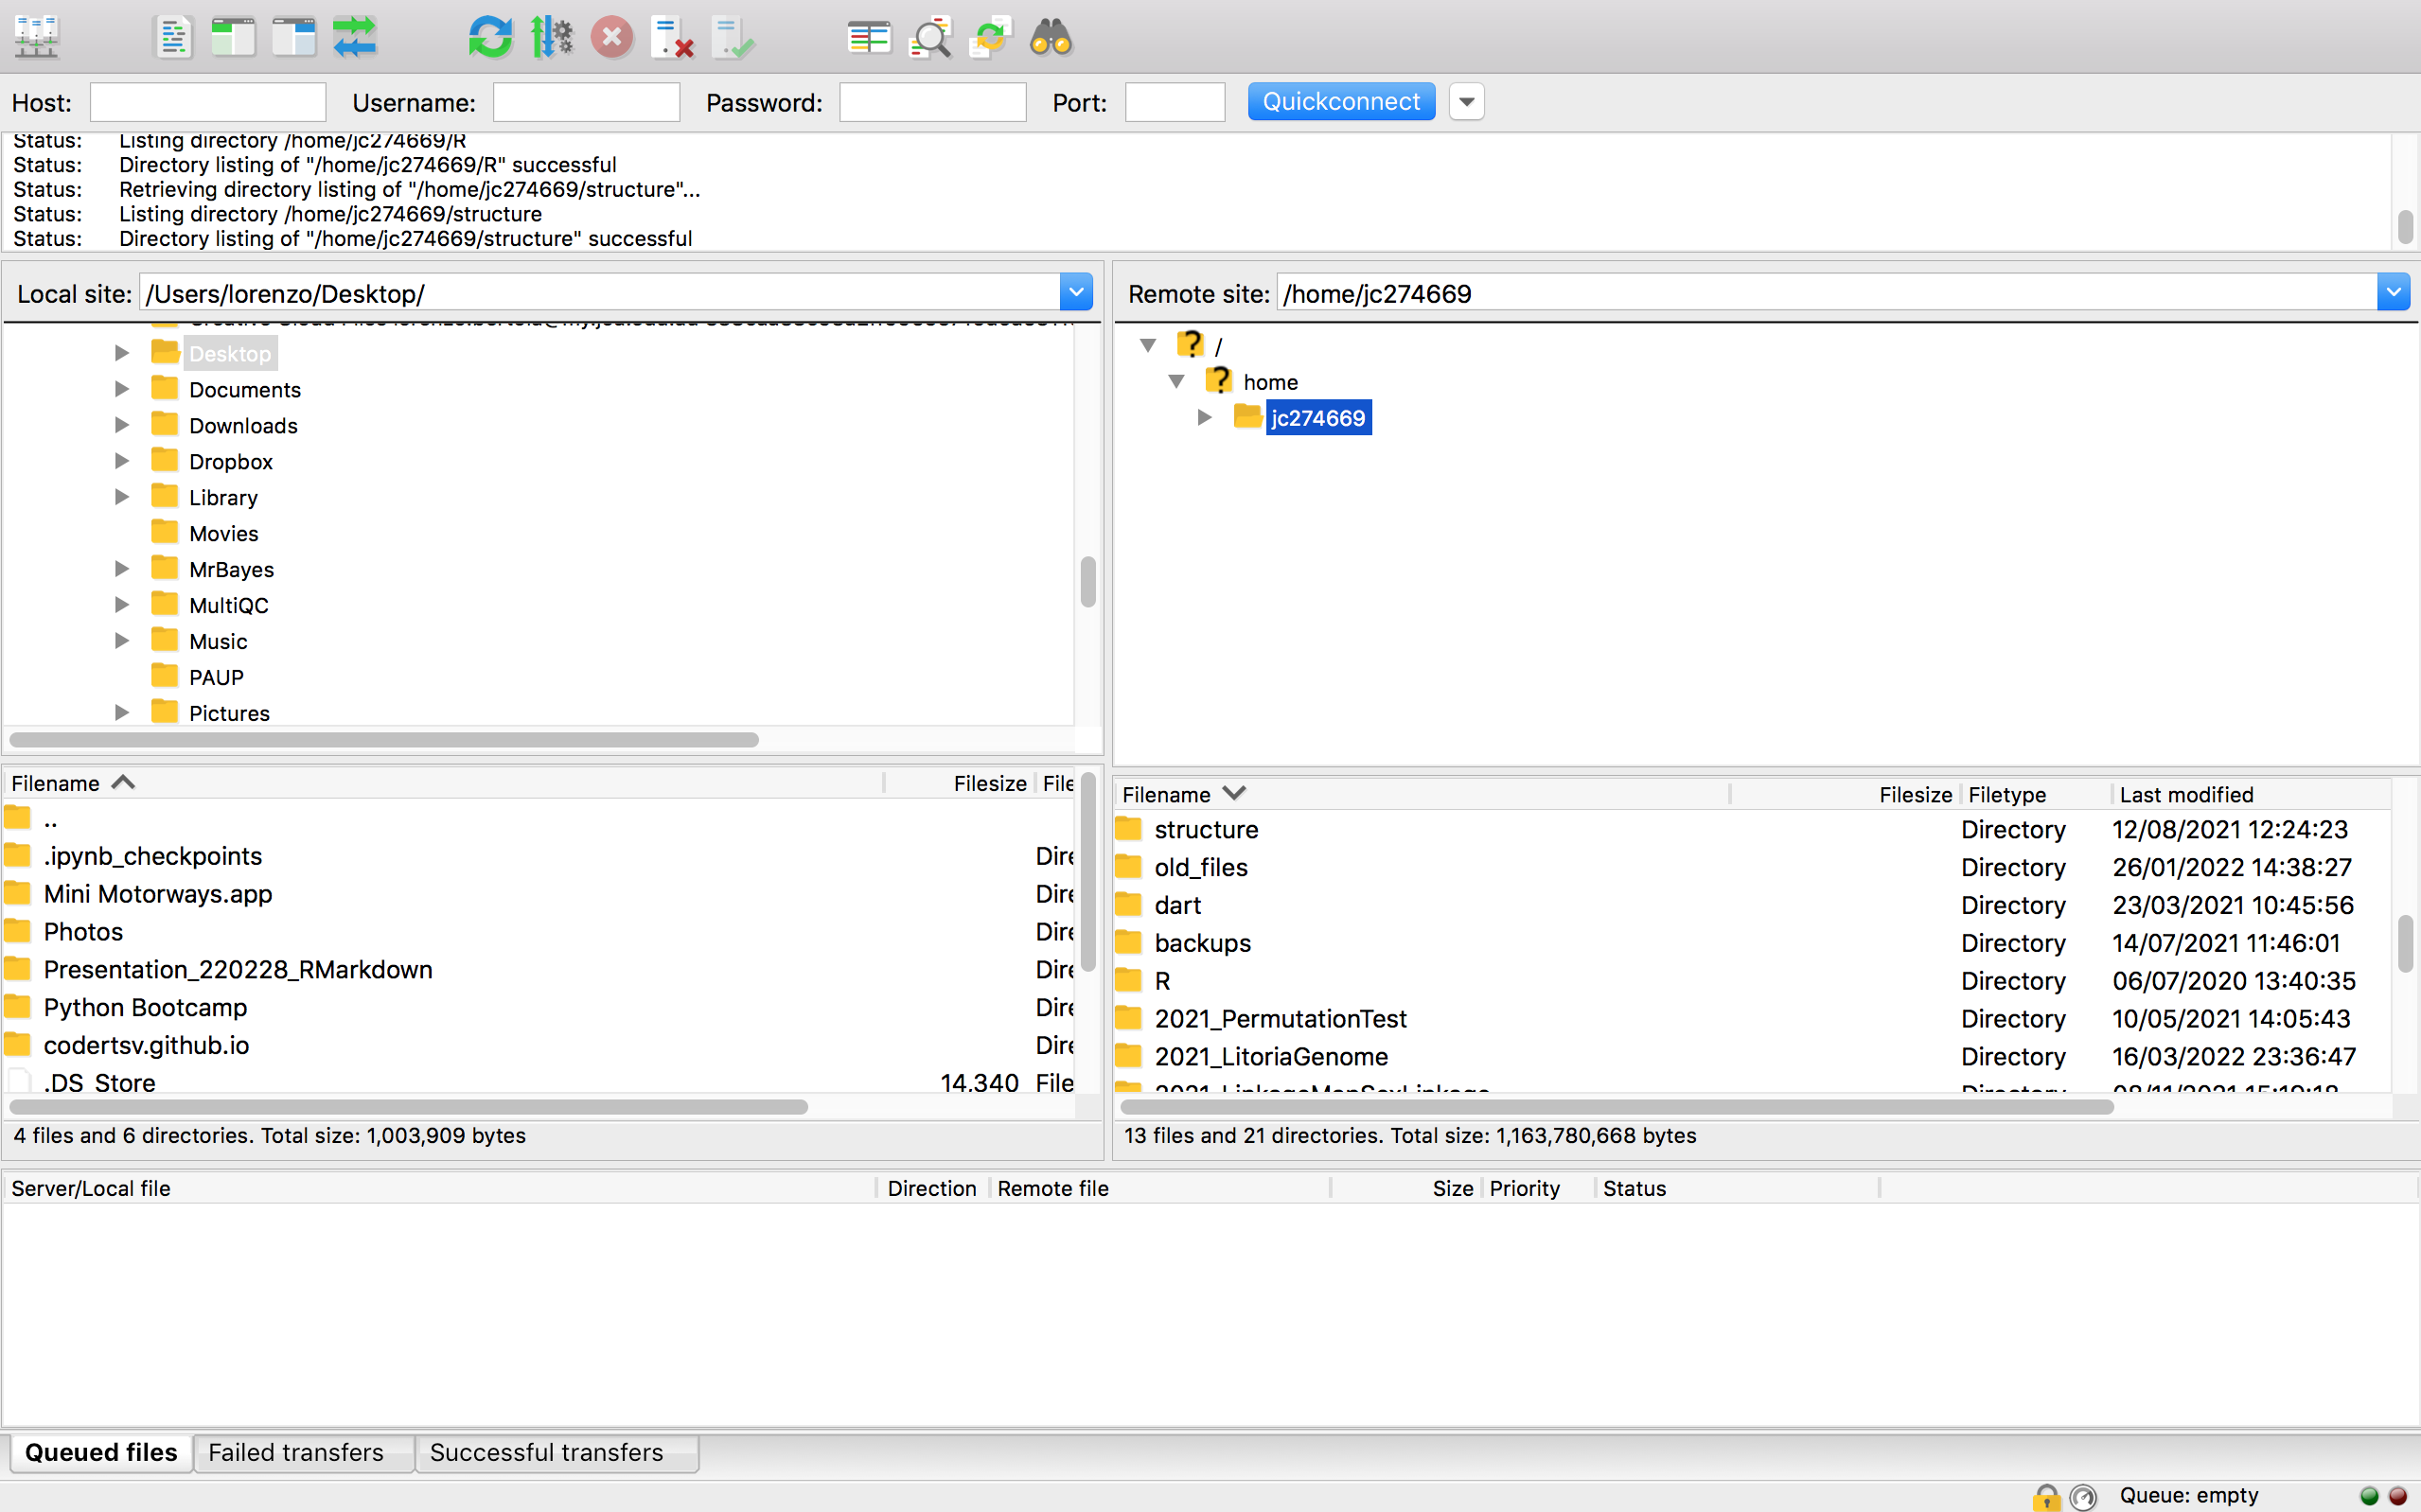
This is where you will store your data, scripts, outputs, etc. If you just created an HPC account this folder will be empty. If you want to transfer your raw data for analyses to the HPC you can drag it from its location on your local site on the left to your desired folder on the right.
Well done! You are now all set up to transfer files between your laptop and the HPC.
A WORLD OF CAUTION: Be careful of how you use FileZilla and WinSCP. Sometimes you might accidentally move files into the wrong folder by dragging and struggle to locate them. Or even worse, if you delete a couple of files by right clicking and selecting delete it will be hard to know which files were selected, and you might accidentally delete a whole folder that you want to retain! I personally prefer to delete file through the command line with rm -i. You will find your own way but just be careful as once deleted from the HPC it is gone!
WinSCP
Just like for FileZilla, for WinSCP as well the HPC team (aka Wayne) has created a useful set of instructions for first time users wanting to set up WinSCP on their laptop. I repeat them here, but for the most up to date guide always go to the JCU Confluence website. You can find Wayne’s post on WinSCP here.
Start WinSCP and Select New Session on top left.
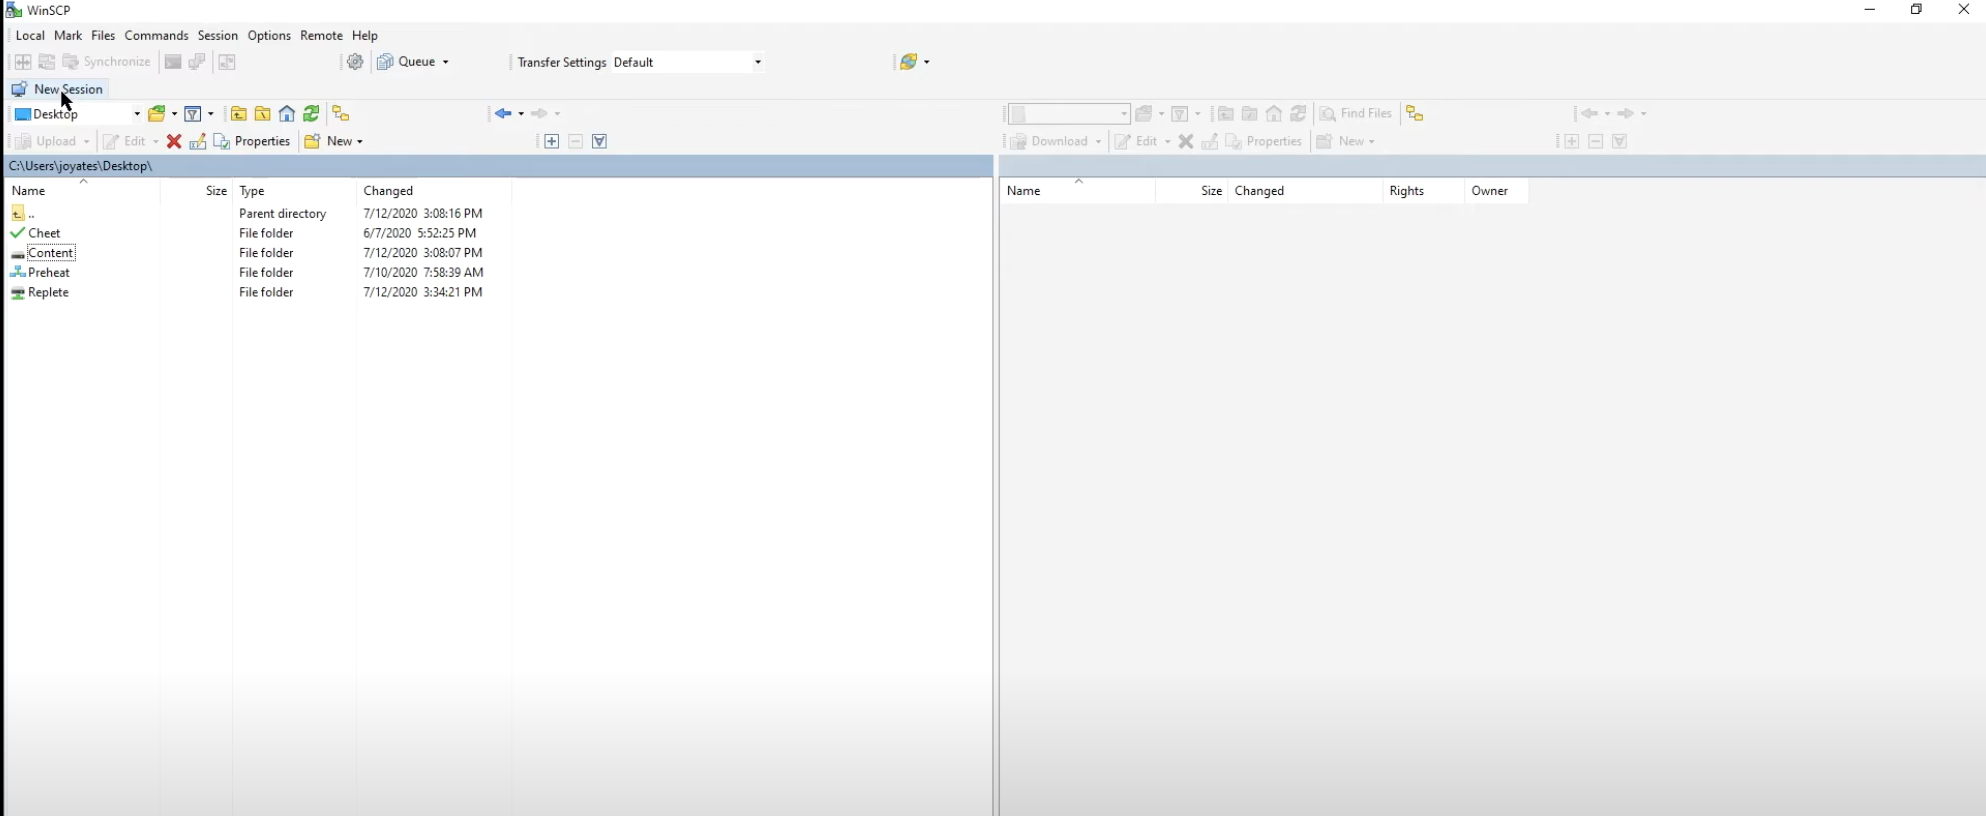
Set the following session settings:
- File protocol: SFTP
- Host name: zodiac.hpc.jcu.edu.au
- Port: 8822
- User name:
- Password:
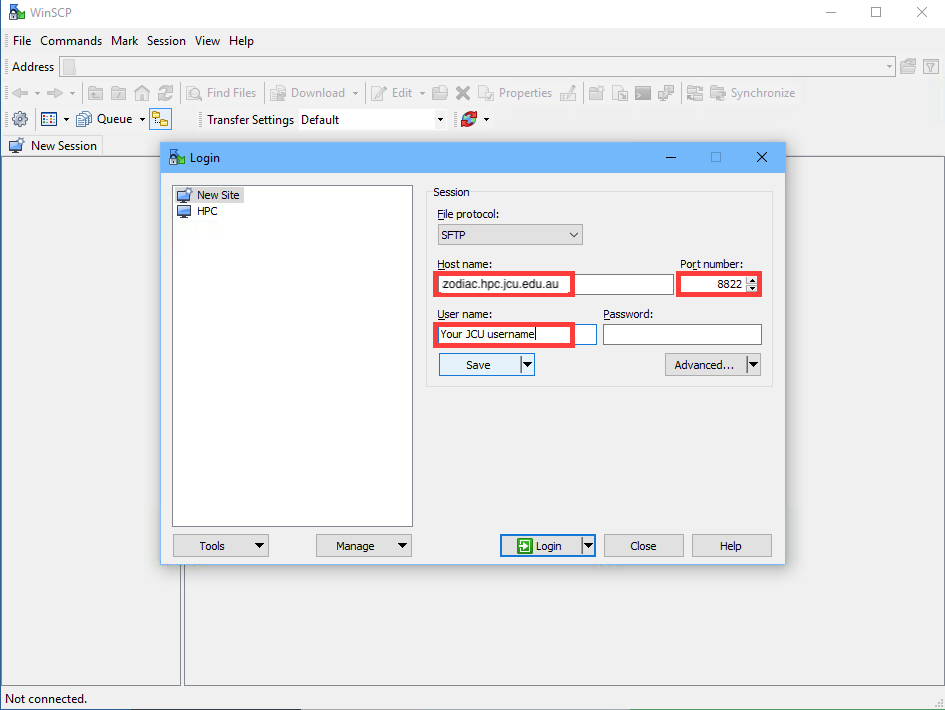
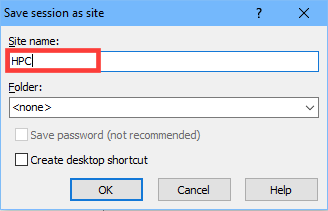
Hit save for faster login next time and call the site something informative (e.g., HPC). Then click OK.
You are now setup to use the HPC. For everyday use you will need to open WinSCP, double click on the site that you saved (e.g., HPC). At this point you will be prompted to enter your password. Enter the password and press OK.
After selecting OK WinSCP will open a windows explorer interface to your HPC home directory.
ADD MORE HERE AND SOME FIGURES.
Well done! You are now all set up to transfer files between your laptop and the HPC.
Transfer files with scp
Finally, you can transfer files directly through the command line using the scp command.
Say for instance that you want to transfer the output of the analyses you ran onto the HPC (remote server) to your laptop, and you are currently working on your laptop. Then you can use the below command from your terminal.
% scp username@zodiac.hpc.jcu.edu.au:~/path/to/file.txt ~/Desktop
file.txt 100% 11 0.2KB/s 00:00
If you are using the JCU HPC your username will be the jc000000 id. Alternatively you can transfer from your computer to the hpc with:
% scp ~/Desktop/file.txt username@zodiac.hpc.jcu.edu.au:~/path/where/to/save/file
file.txt 100% 11 0.2KB/s 00:00
Additionally, you can also transfer between two remote servers
% scp username@remote_1:/file/to/send username@remote_2:/where/to/put
Finally, if you are using scp from outside campus you will need to add the -p 8822 port as per below:
% scp -P8822 username@zodiac.hpc.jcu.edu.au:~/path/to/file.txt ~/Desktop
file.txt 100% 11 0.2KB/s 00:00
Downloading data directly from databases
One final commmon way you will transfer your data to the HPC for your analyses is by downloading it directly from a database. For instance you might download weather data for your species distribution modelling from the Bureau of Meteorology, or you might download the genome sequencing data from a large collaborative project from the project/organisation database. Often databases and projects will have a set method to download their data, so it is beyond the scope of this post to show you all options. But, to give an example, let’s look at a common command to retrive data from the web: wget.
EDIT: I used to have a nice tutorial script on scraping weather data from the bom with wget but it doesn’t work anymore :/ I will need to update this.
Setup ssh key
To-do